Registers
In ADE, registers are used to store input/output data and control widgets. This chapter is to describe how to use registers in ADE.
We can categorize ADE’s widgets in three groups:
-
Input Widgets:
These widgets allows inputs from users or communication interfaces. Widgets such as various Buttons, Touch Area or RTC are in this category.
-
Output Widgets:
These widgets present data in HMI or output data via communication interfaces. Widgets such as Gauge, Progress Bar or Image List are in this category.
-
Input&Output Widgets:
These widgets have the attributes of both Input Widgets and Output Widgets. Widgets such as prograss bars with knobs are examples.
Any input value for HMI can be stored, modified by widget setting, or manipulated by a Blockly function. Thus, a place holder is required to store the input value. This place holder is called Registers. You can image registers as global variables in any high level programming language or X, Y, D, M registers in PLCs. Every register in HMI has a unique name and ID for identification. Registers has the data type attribute for ensuring the right data format is adopted.

Users who would like to learn more about Registers and how to use them, please take a look at our educational video:
-
Educational Video
Registers
There are three types of registers in ADE:
-
System-Defined Registers:
System-Defined Registers are pre-defined in ADE enabling users to perform system-level functions such as changing pages.
-
Product-Specific Registers:
Different IOT products have a different set of I/O. As a result, the Product-Specific Registers are required to reflect the product difference. These registers are pre-defined, too.
-
User-Defined Registers:
As the namme suggests, these registers are created by users. Users are allowed to delete these registers.
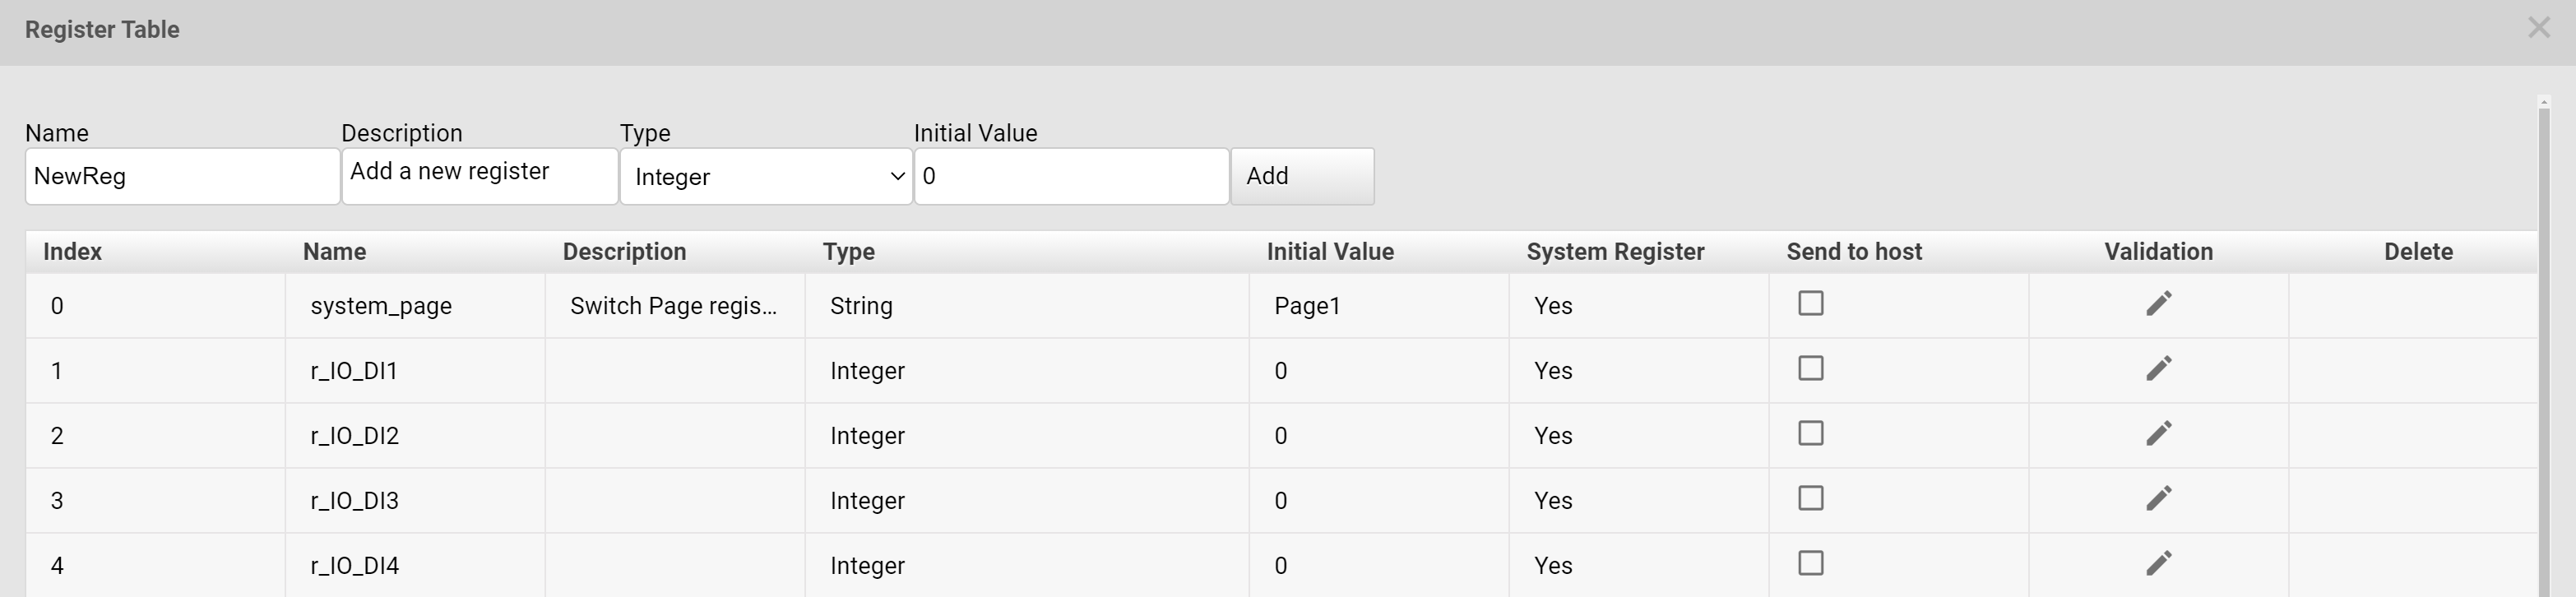
In Register Table, users can create User-Defined Registers:
When creating a new register, users are asked to enter the Name, Description, Type, and Initial Value before hand. When “Sent to host” is checked, any value change on this register, the value is sent via the pre-defined communication protocl. The “Validation” attribute allows users to modify the regiser’s value via a Blockly function. All the user-defined registers are deletable.
ADE automatically assign an ID to a newly-created register. Users can drag the register around in the Register Table to change the ID number.

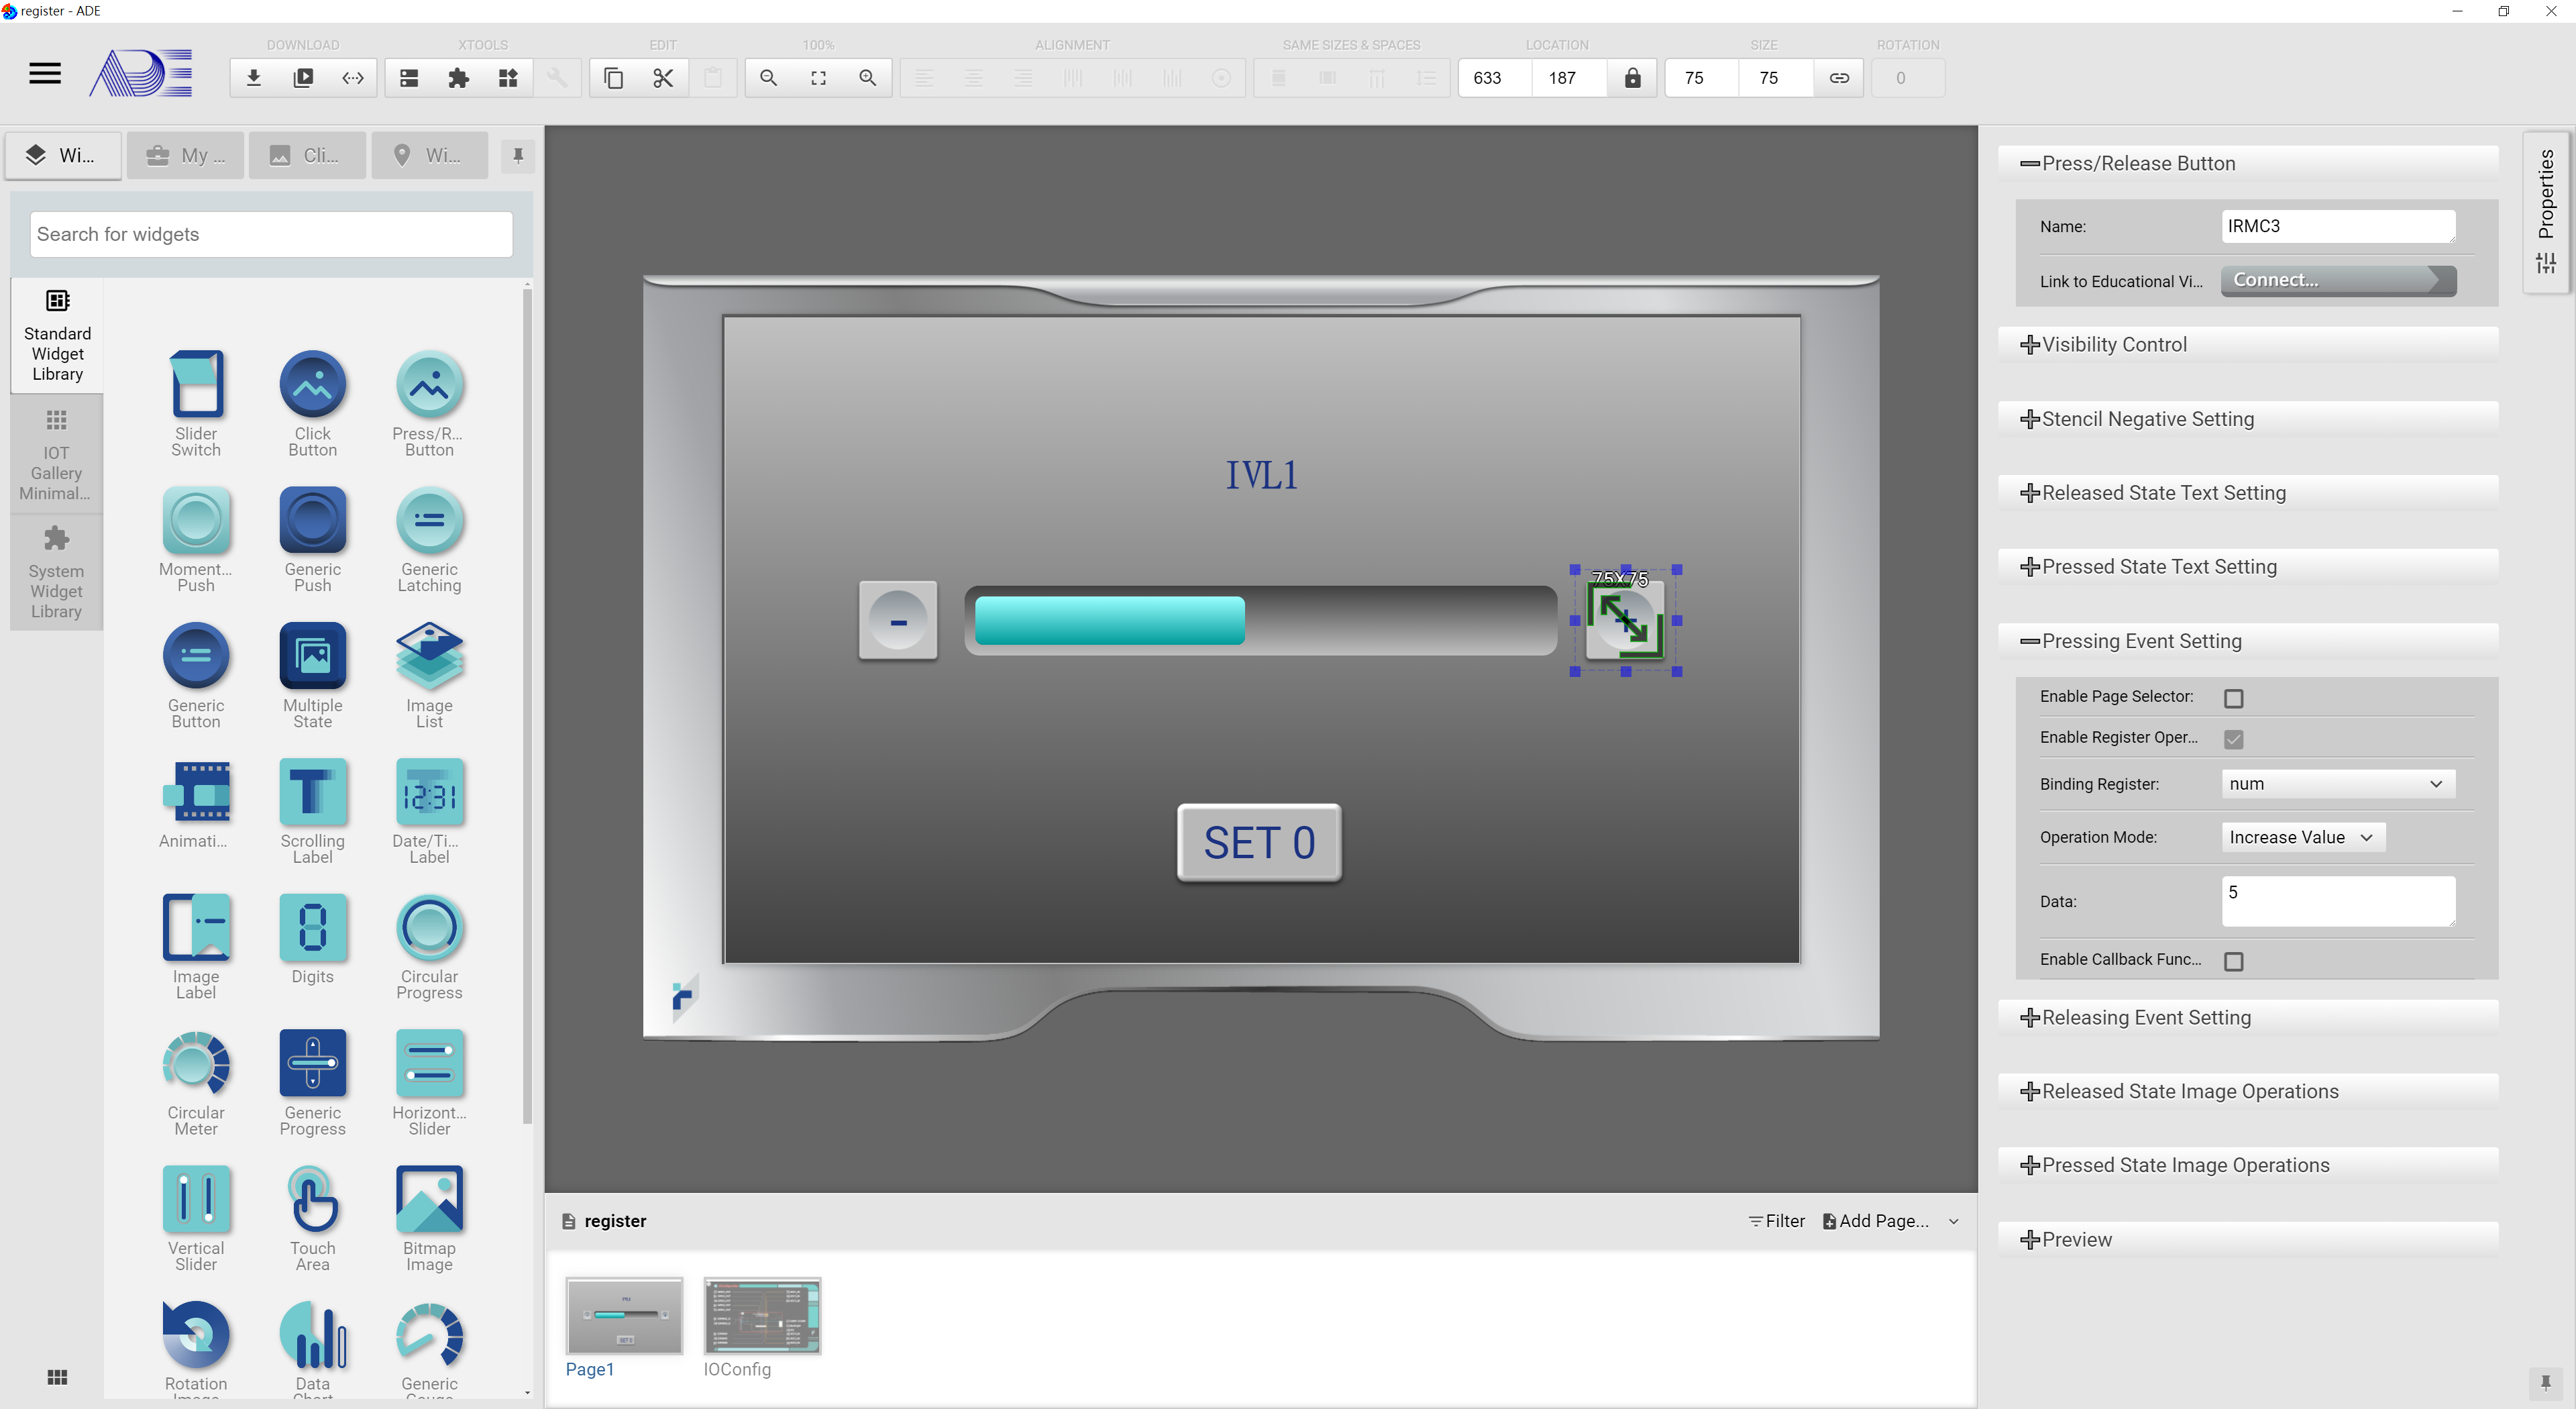
When users want to store a value from an Input Widget, users can accomplish this simply by binding a register to this widget. On the other hand, when users to display a stored value, they can bind a register to an Output Widget for such purpose.
Users can learn how to bind and operate registers from the following example:

First, bind register num to + push button event and set the increasement amount. Once this push busson is pressed, the value of the bound register is increased by such amount.
Next, bind register num to - push button event and set the decrement amount. Once this push button is pressed, the value of the bound register is decreased by such amount.

Bind register num to Set 0 push button’s event and set the value of register num to zero once this push button is pressed.

To complete this HMI project, a Progress Bar and a Scrolling Label are then dragged and dropped into the design panel. These two widgets are also bound with register num. The maximum and minimum values of the progress bar is set to the desired values. The Scrolling Label is to show the value of register num.
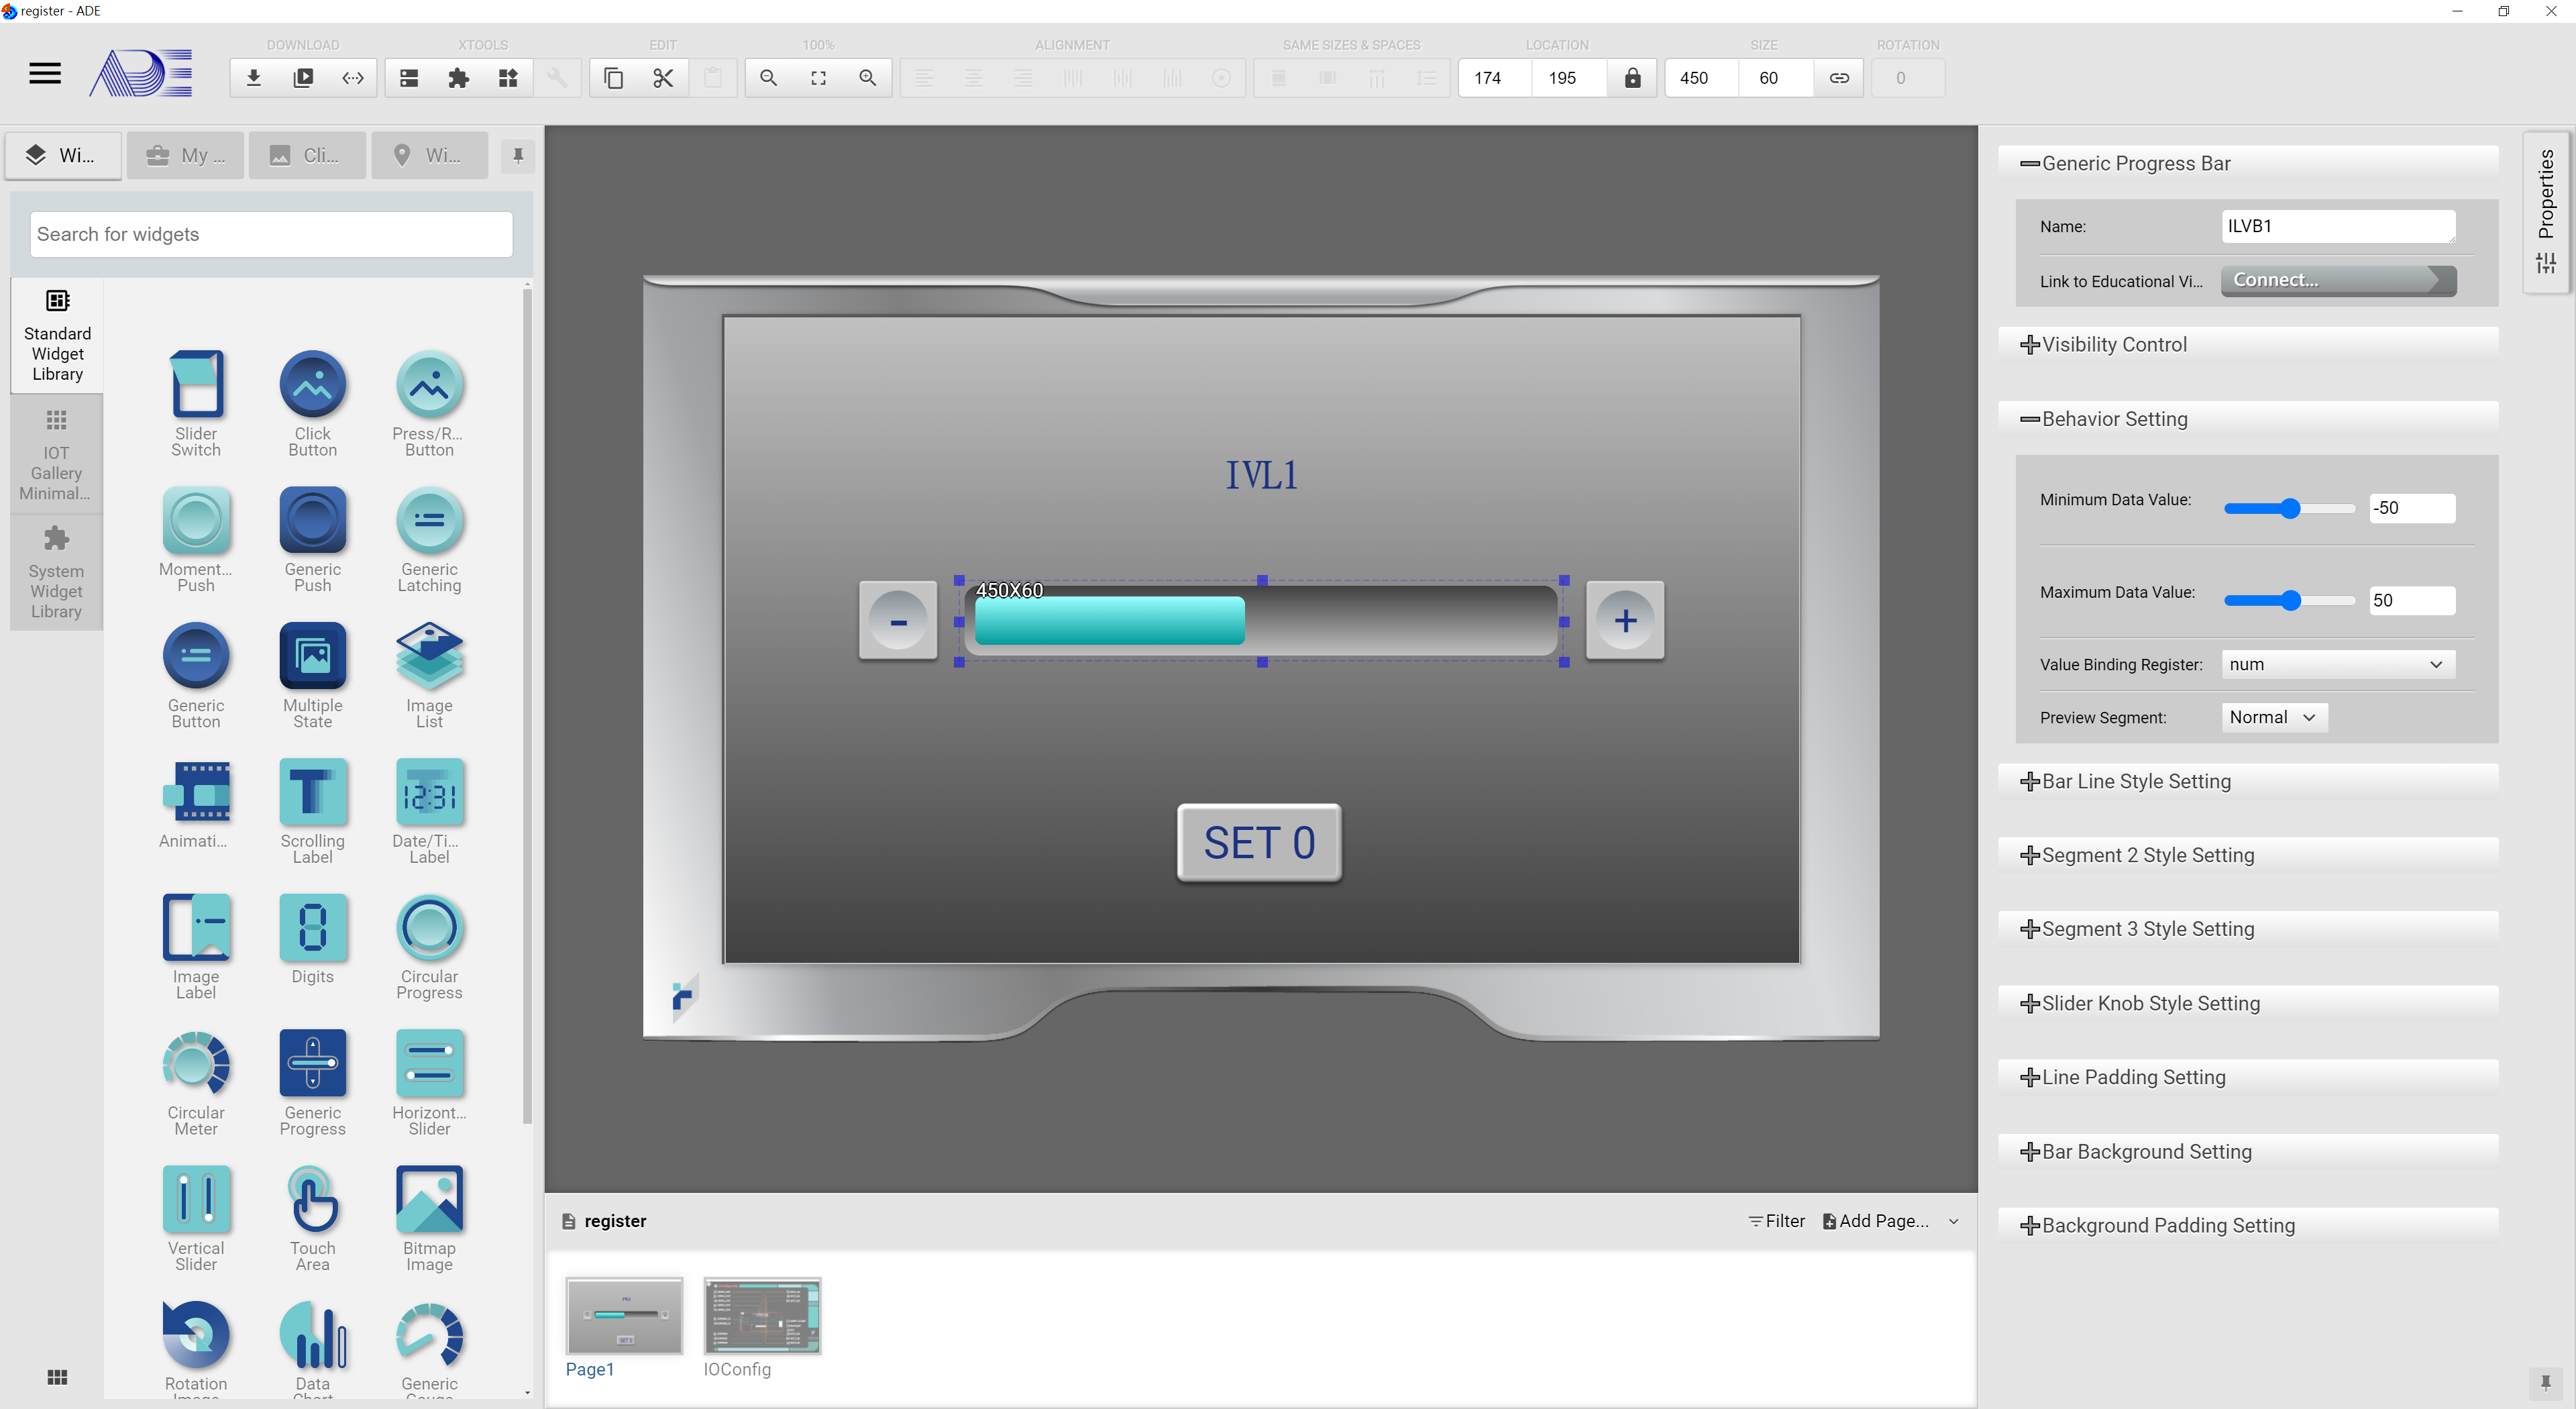
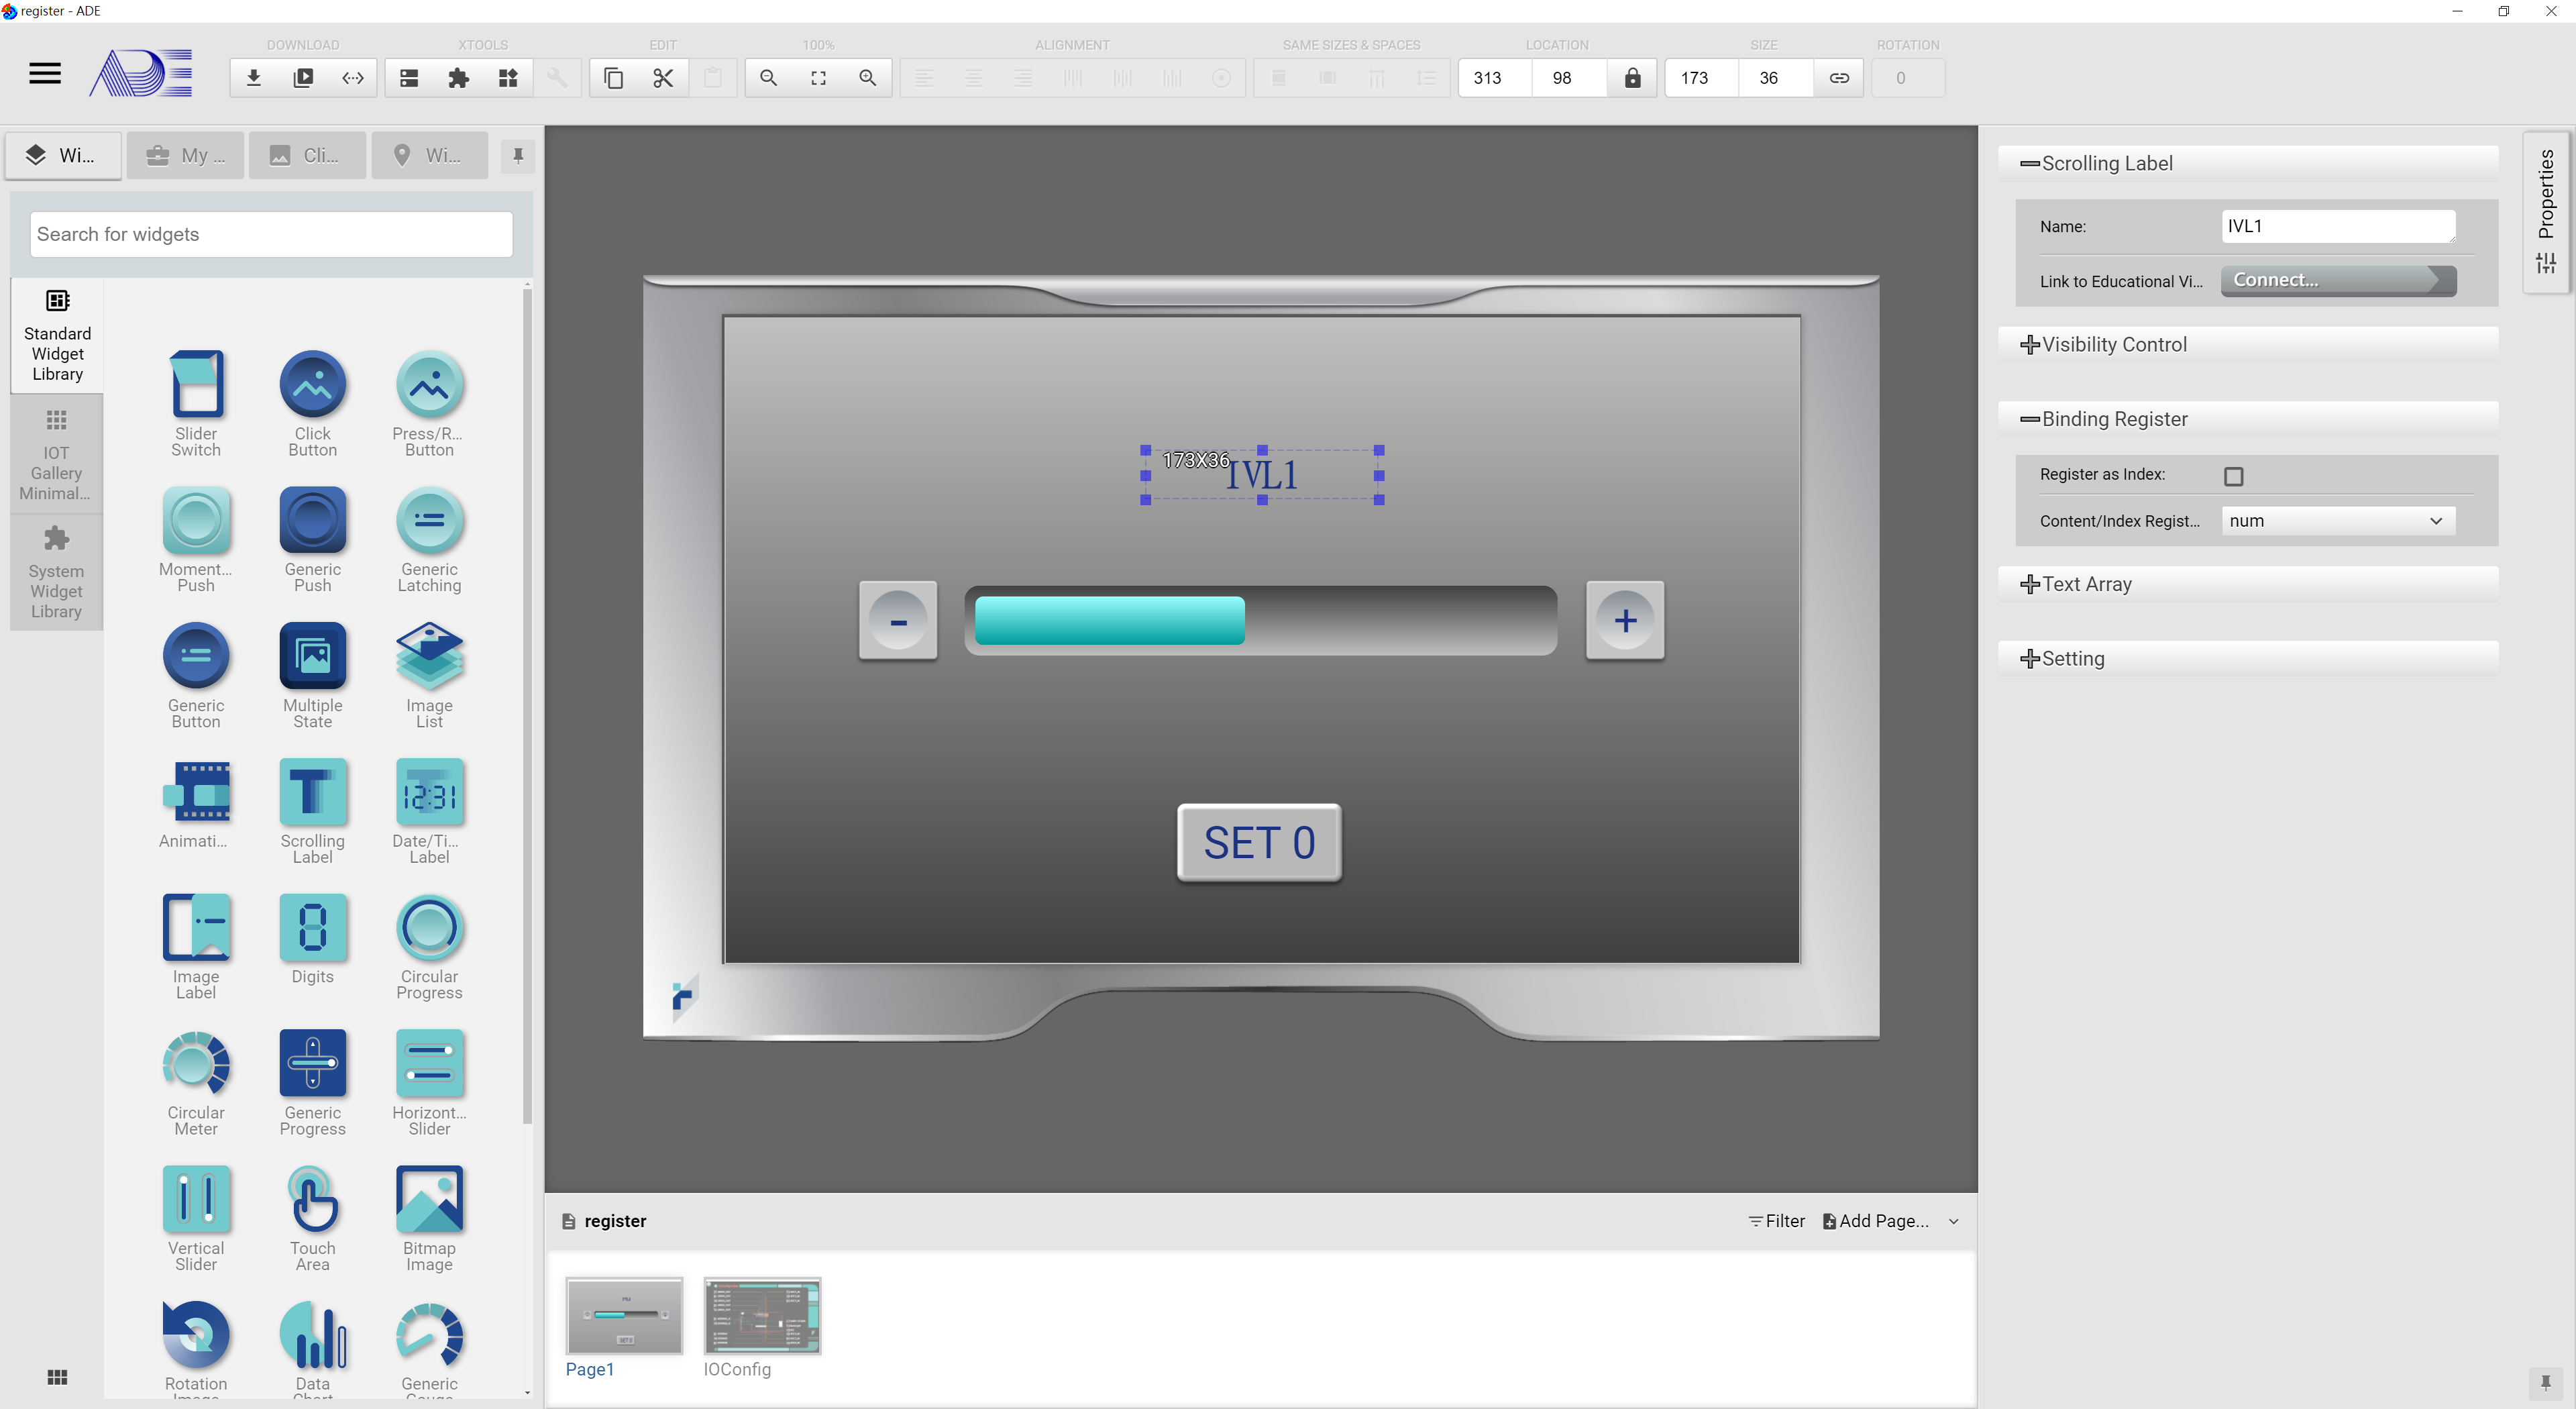
From the above example, we learn that a register’s value can be altered by input widgets and can be shown by output widgets.
How to use registers
For how to use registers in ADE, please refer to Register Tabel Editor and Register Operation.
Registers can be manipulated by the built-in Blockly viusal programming langague:
In any ADE’s Blockly Editor, choose Register Tag, the following pop-up menu will show. The first block is the function to set register. Other blocks represent all the registers defined in ADE.
-
Set Register: Set Register Block is to set the value of a register. First, users can select which register to be set. Following this block, a value block can be attached. The assigned value’s type must meet the type definition of the regsiter. If this register is bound with an output widget, the change of the register’s value will be reflected next time when the screen refreshes.
-
Register Usage: Register blocks are be used in math, logic or string operation blocks.
In addition, registers can be used for triggering events. Any change of the register value triggers an execution of pre-specified program.
Users can use a system widget called Register Observer for monitoring any change of a register. If the value of a register is modified by an input widget, I/O pins or a Blockly function, the Register Observer is triggered. Then the bound behavior program, a Blockly program, is called and executes.
Click Register tab, all Register blocks and Register Setting block are shown.

For Register Setting block, users can choose which register to set and then assgin a value to this register.

How to use register, how to get the register’s content and use it in a math operation: