Export
Once Export is selected, a pop-up dialog window will appear:
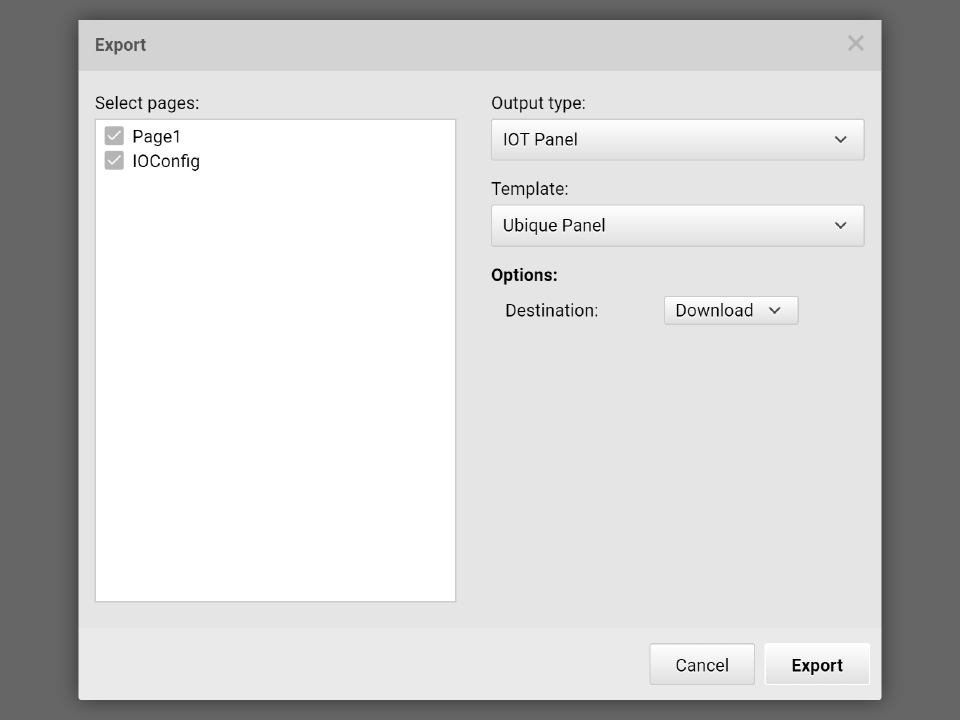
On the left hand side, users can decide which pages to export by clicking the check box of each page. If users want to enable the I/O functions, the “IOConfig” page must be exported. Keep in mind that all the target pages that are the destination of a page transition must be exported otherwise the HMI design will malfunction.
Output Type
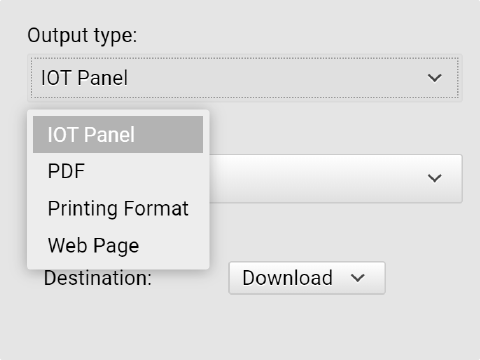
On the top-right conner of the dialog window, there is a pull-down menu that allows users to specify the output type for exporting. ADE supports the following output type:
-
Exporting output type:
- Export to an IOT product. Export HMI design to an IOT product or launch the simulator.
- Export to a PDF file.
- Printing, exporting to a printer.
- Exporting to a web page in HTML format to be viewed by a browser.
Template
The second pull-down menu is the exporting template selection. Each output type has one or more output templates. These templates will be explained in detail latter.
Options
The third pull-down menu offers option selection. Different output types have different options. These options will be explained in details latter.
Exporting to IOT Panel
This export option downloads the HMI design from ADE to an IOT product.
Connecting to the control board
First, please connect the PC running ADE with an IOT product via a USB cable. During exporting, ADE automatically detects the type of product for the destination and starts the exporting process. ADE does not support exporting to multiple devices at the same time.
If users would like to confirm if the USB cable is connected to our device correctly, they can ask ADE to detect and gather the device’s product information. Users can go to the Settings in the System menu and click “Installation and Update” tab. Then select “Get Board Information”:
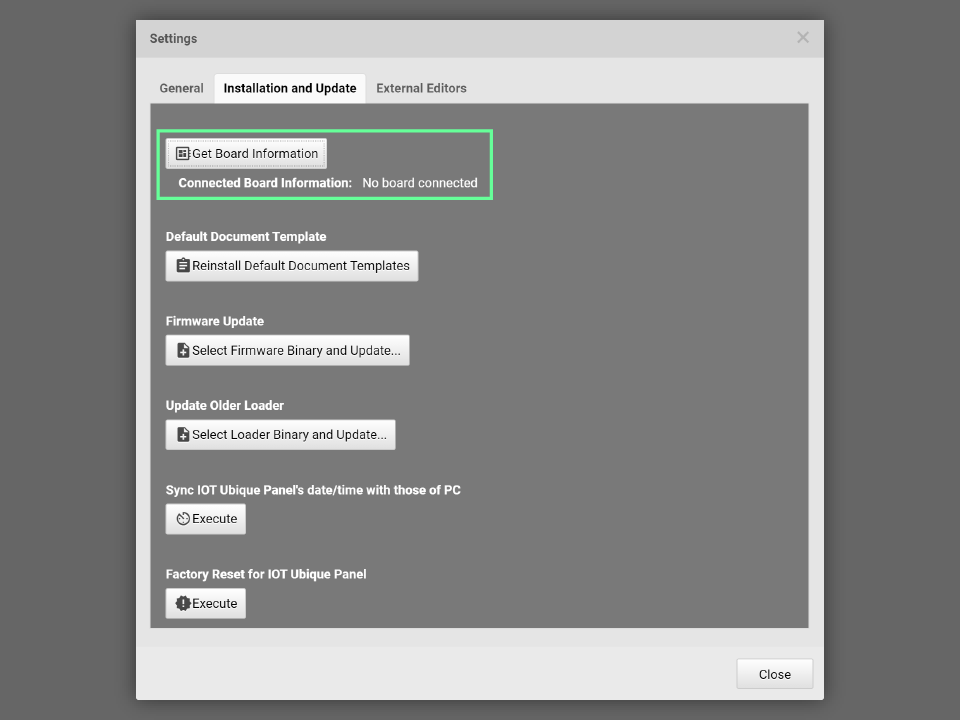
If no control board information available or no board connected, the following message is shown:

 Note: If this dialog box is opened before establishing USB connection with the IOT's control board, please click Get Board Information button again after the USB cable is connected for retrieving the board information. Please refer to Settings
Template
Under IOT Panel output type, users can export ADE design to our Ubique Panel and Nexus Panel product lines. Users can also launch the ADE built-in simulator by selecting Simulator as the template.
Options
-
Destination:
-
Launch Simulator:ADE will launch the built-in simulator and export the HMI design to the simulator. Keep in mind that launching the built-in simulator does not require the connection to the IOT’s products. The simulator shows up on the screen and users can directly verify their HMI design. However, this built-in simulator can NOT simulate the I/O and communications.
-
Download: ADE will export and download ADE design to the control board of IOT products. Please make sure the USB cable is connected between the PC running ADE and the IOT’s product. During the exporting, a dialog window shows the process and status of the process. If the error count is zero, the dialog window notify that the download is successful and prompt the users to close the dialog window. Otherwise, the error messages in red appear in the dialog window:
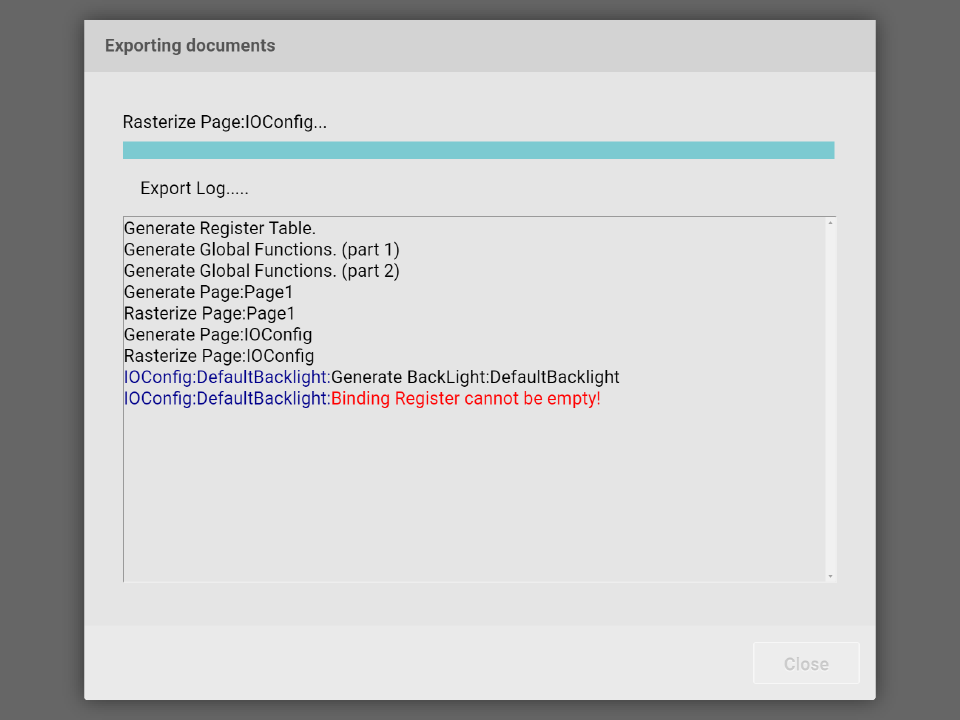
If the error count is not zero, ADE will not export the design to IOT’s products nor will ADE launch the built-in simulator.
-
Save to File: This function is for technical support. When users run into issues in using ADE, they can export their HMI to a file by using this option and send the saved file to our technical support team for debugging.
-
Exporting to PDF
This output type exports the HMI design to a PDF-formated file.
Template:
-
Brochure Export Tempate: Export HMI design pages only.
-
Default Export Template:Export HMI design pages along with the page note.
Option:
-
Image Format:Both scalable/vector and bitmap/rasterized formats are supported for exporting HMI designs. In most cases, images inserted by the users will be exported in the bitmap/rasterized format.
-
Page size:Select A3, A4, A5, Letter, Legal and Tabloid format.
-
Orientation:Portrait or Landscape.
-
Column:Select one or two columns per page.
-
Row:Select one or two rows per page.
-
Backgroud:Set the background color and opacity for the exported PDF page.
-
Margin: Set the margin for the exported PDF page. Three options are available: None, Normal, and Large.
-
With Title:Select if the title is needed or not.
-
With header/footer:Turn on or off the header and footer.
-
With notes:Turn on or off the not.
-
Draw borders: Choose if border is drawn on the PDF exported pages.
Printing Format
This output type shares the same functionality as that of PDF except that this function outputs the HMI design directly to the printer. Please refer Export PDF。
Web Page
Exporting HMI design to HTML formated web page.
Template:
-
Default HTML Template: Exporting HMI design to a signle-paged web pate.
-
Clickable Prototype HTML Template:Exporting HMI to a web page with hyper links.
The file selection dialog box appears prior to exporting for allowing users to select the exporting directory. The directory contents will be cleared completely, and the exporting file will be written into this directory. After exporting, please click index.html to view your HMI design in a web browser.